Snowshoeing Made Simple: A Step-by-Step Guide for Newbies
Our content may include affiliate links, through which we earn a small commission on purchases. Want to learn more about us? Read here.
Discover the joy of snowshoeing with our beginner’s guide! Learn everything you need to know, from choosing the right gear to mastering the basics. Start your winter adventure today with Life in Utopia’s step-by-step guide.
As a native of the Pacific Northwest, I’m accustomed to the ever-changing weather we may see within a day, and yes, this includes a lot of rain. One of the unique aspects of the northern latitudes is the ever-changing seasons, and here, that means snow in the higher elevations.
We have very defined starts and ends for each season, and as one season ends, I daydream about the next.
I follow the local meteorologists’ predictions each year in the early fall, hoping they’ll tell me we are looking forward to an early snow season or even a heavy snowpack. Winter, in particular, is our favorite season for winter storms and snow sports.
But for newbies, there can be a huge learning curve or a financial barrier to entry to most snow sports with gear, equipment, lessons, and resort fees.
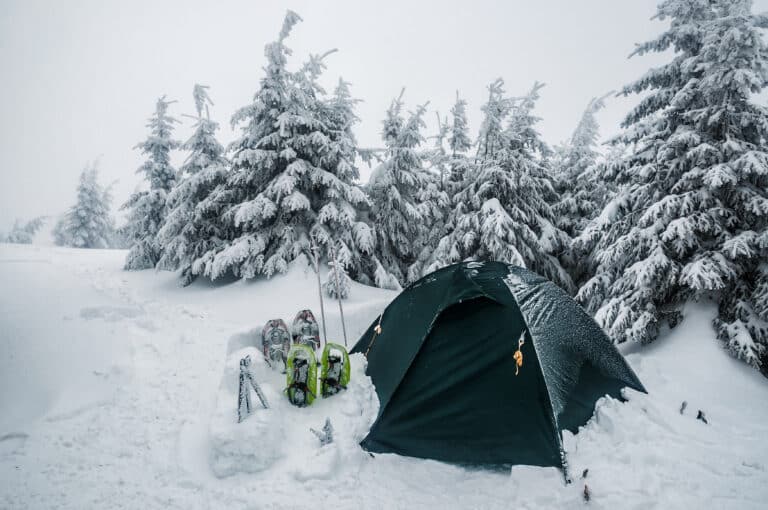
There is one exception to this: snowshoeing. It brings all the solitude of the fresh mountain air in a forest blanketed with snow and without barriers like other snow sports. Snowshoeing is easy to learn. Most people do it within a matter of steps. I say with confidence.
If you can walk, you can snowshoe. Our public forests are the ideal launching place. The snowshoes are inexpensive to buy and even less to rent, making this something you can do whenever there is snow!
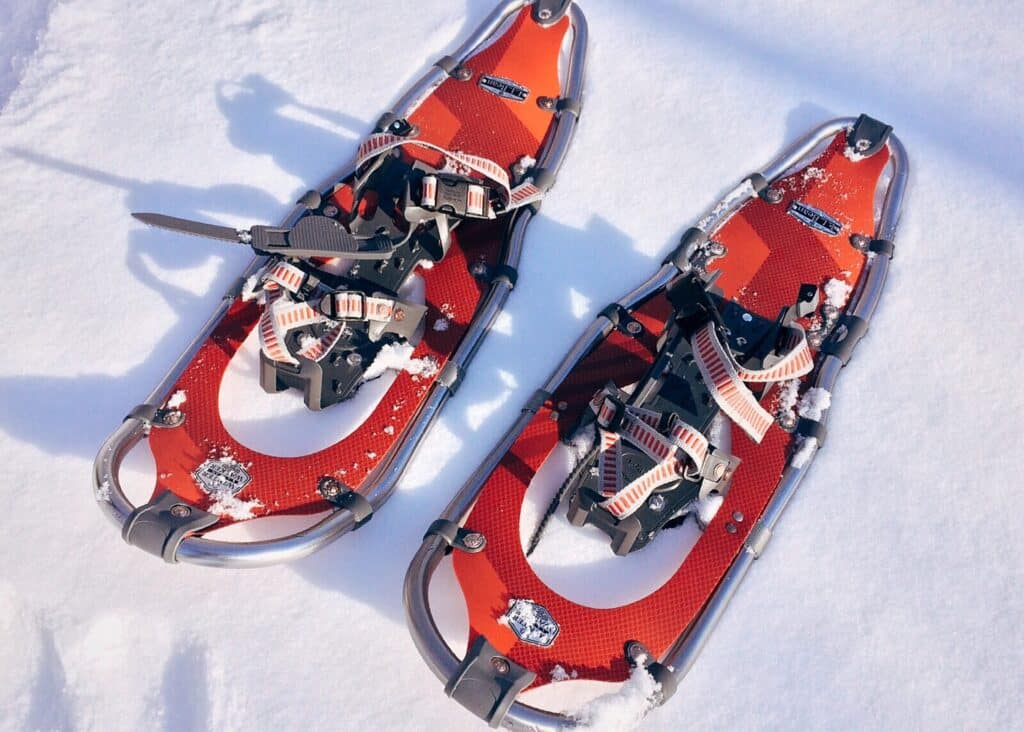
Modern snowshoes are typically made of tubular aluminum that creates a frame for a synthetic material to attach to. This material creates a deck where your boot will sit.
They are designed to displace the user’s weight, allowing the user to travel on the top of the snow rather than sinking in, almost like you are floating. They are often outfitted with metal crampons or gripping teeth to ensure traction and grip on icy hard surfaces.
Most snowshoes come in just a few sizes, typically determined by the user’s weight. They fit securely with ratcheting bindings, making them easy to use with various boots.
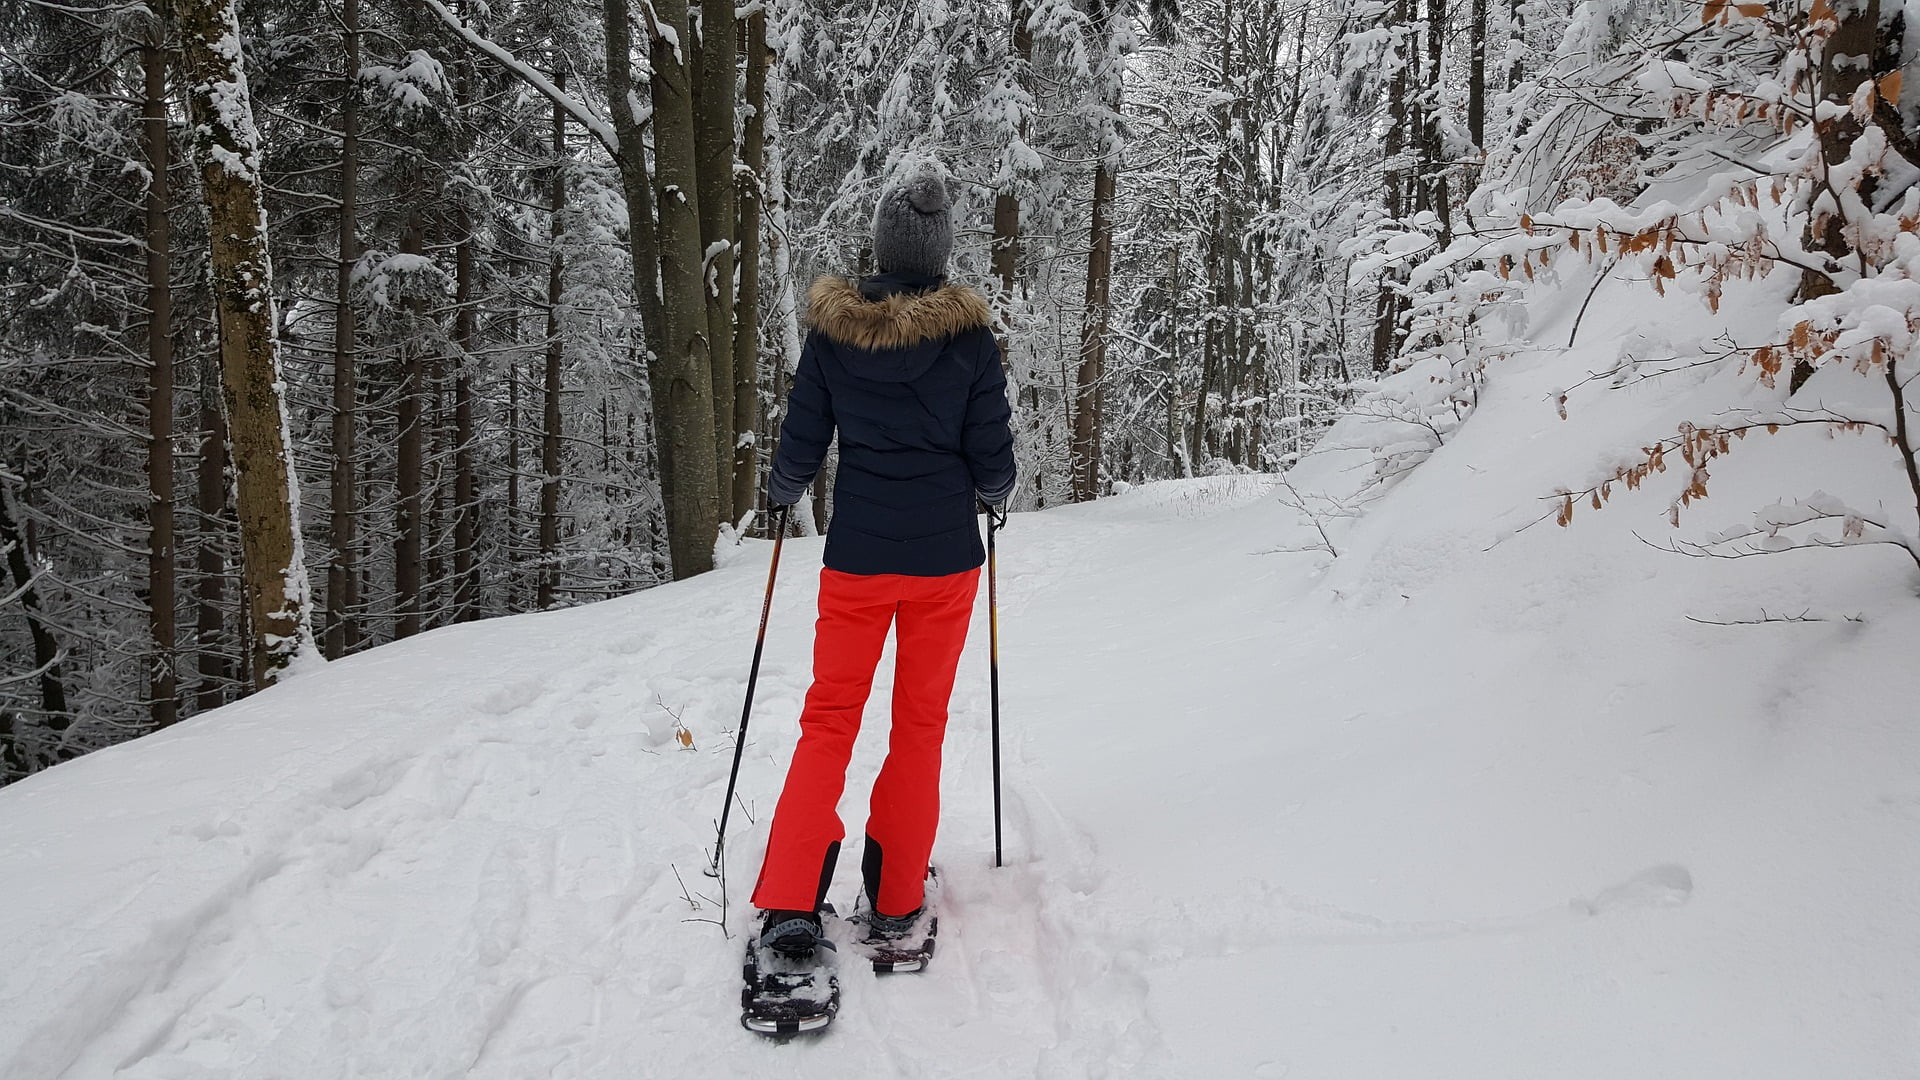
Although not required, I recommend trekking or ski poles for a beginner snowshoer. The poles aid in balance and provide extra contact points that can provide support should the terrain get steep or icy.
What to wear on the trail?
Snowshoeing demands a strategic approach to clothing, involving layers for both the upper and lower body. Equally important is the selection of garments that excel in moisture-wicking. The moment you set out and start moving, your body heat will naturally climb, keeping you comfortably warm as you work up a sweat.
However, this scenario swiftly changes when it’s time for a break. Your body temperature drops and any lingering moisture in your attire can rapidly become uncomfortable. This shift in conditions can potentially expose you to severe risks like overheating, dehydration, or even hypothermia.
Therefore, it’s a common practice to constantly adjust your clothing layers, shedding them during activity and quickly reapplying them during rest periods. Recognizing these potential challenges is crucial, and being prepared for any situation that may arise while on the trail is paramount.
Base Layer
As the name suggests, the base layer is your initial garment, typically the one clothing item that stays with you throughout your journey. It holds a pivotal role in ensuring breathability and efficient moisture management. When selecting a material for your base layer, steer clear of cotton fabrics, as they tend to retain moisture rather than wick it away from your skin.
I lean towards wool for its insulating properties, moisture-wicking capabilities, and ability to dry rapidly when damp. Alternatively, there are synthetic base layers available that offer many of these same advantages. When it comes to the fit of your base layer, aim for a snug yet non-restrictive fit to optimize its performance.
Middle Layer
This layer is your insulation, and it’s often the one you’ll shed as your body heat builds up. It’s essential to ensure that your backpack can accommodate this layer when you remove it. Your middle layer can consist of a heavier wool flannel, a fleece jacket, or a softshell garment.
A down layer can also be an effective middle layer in colder conditions. However, be mindful that down insulation tends to trap heat efficiently, so you may warm up rapidly while wearing it, potentially causing it to become damp from perspiration.
Outer Layer
This layer is your ultimate barrier against the elements, necessitating waterproof qualities. Breathable and waterproof ski pants are the optimal choice for snow sports. When choosing a jacket for its fit, consider that you need a full range of motion while navigating the trail.
Remember that the outer layer will encompass the middle and base layers. Therefore, you might consider sizing to ensure sufficient space for all the layers.
Socks, Boots, and Gaiters
The best socks for snowshoeing will be made of wool to provide warmth and cushion, ideally, and will pull moisture away from your feet. It’s also preferred that the socks are taller than your boots. As a beginner to snowshoeing, you may consider using a pair of boots you already have that have a lug sole, are tall, and are waterproof.
Ideally, a tall snow boot with extra insulation is best. Gaiters are optional but will be very useful in keeping snow out of the top of your boots when in deep powder.
Hat, Neck Gaiter, and Gloves
A hat and a neck gaiter are ideally insulated and made of wool. Mittens or gloves specific to snow sports with leather palms and removable liners. Some gloves have handy wrist straps to keep your gloves secure when you’ve taken them off and reduce the risk of dropping them in the snow.
Eye Protection and Sunscreen
These are both a must to protect you from the sun’s UV rays, which are more intense at higher elevations, and the reflection off of the snow can cause snow blindness. Don’t forget your SPF lip protection.
Below is an essential list of what you need for your first snowshoe trip
- Snowshoes
- Trekking Poles (ski poles will work too)
- Snow Boots or other tall waterproof boots with a lug sole – size up
- Boot Gaiters
- Day-pack with the 10 Essentials
- Breathable waterproof jacket and snow pants
- Down Coat, Button-up Wool Shirt, or Flannel
- Base Layer – wool or synthetic material that’s breathable & moisture wicking
- Socks – wool, preferably
- Beanie
- Balaclava, Neck Gaiter, or Scarf
- Polarized Eye Protection – sunglasses or ski goggles
- Camera
- Water
- Snacks and a Thermos with a Hot Drink
- Navigation – trail map, GPS (our goto is the AllTrails app)
- Trailhead /Sno-park permit- These vary by state. Check with the local Ranger Station for required permit information.
Where to go Snowshoeing?
- Sign up for a snowshoe tour with the local mountain or outdoor adventure shop. These often include the snowshoe rental, instruction, and guided tour.
- Ski Resorts often have uphill snowshoe routes and sometimes host group walks.
- Sno-Park or Permit Areas designated for snowshoeing. Look for snowshoe and other winter trail maps at your local outdoor shop.
- Check out recommendations on the AllTrails app.
The Basics
Before leaving town, practice putting the snowshoes on at home before your trip. This helps familiarize you with the gear beforehand and helps you discover if you are missing anything. Be careful where in your house you are trying them on since most snowshoes have spikes underneath.
Snowshoeing on a flat trail is the best way to get your initial bearings. It will take a few steps to get accustomed to the feel of the snowshoes and the free heel. You will also find that a wider stance is necessary, so you are stepping on the snowshoes wider than your boots.
While you get accustomed to the broader step, your body will let you know you are using different muscle groups.
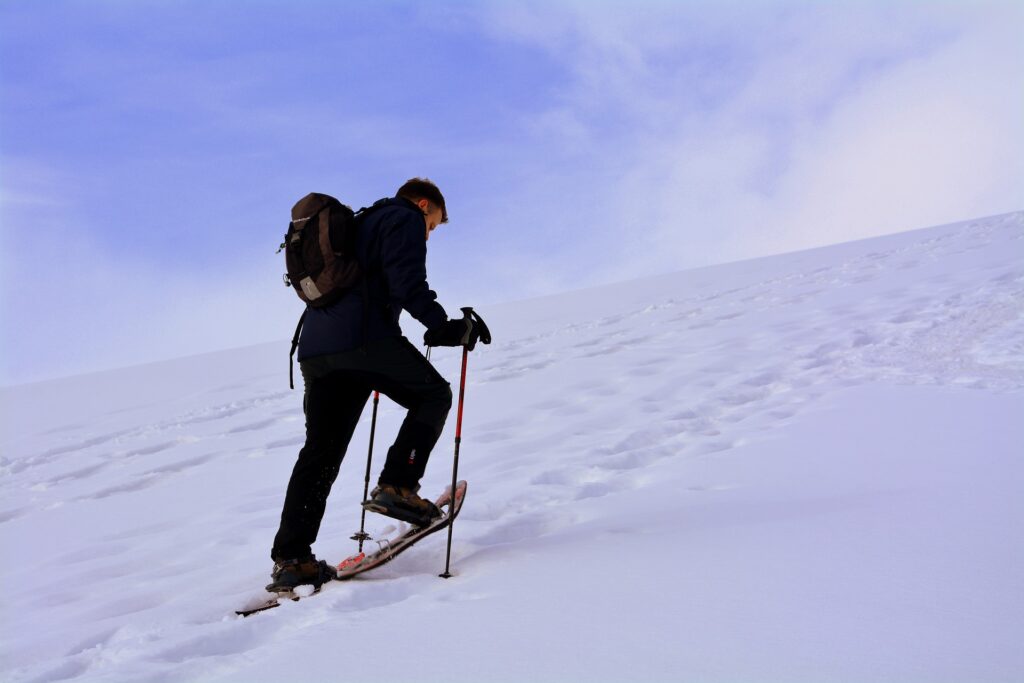
Snowshoeing up a hill will vary depending on the pitch or steepness of the trail. Generally, you will go straight up the hill when the incline is less steep or traversing, which involves making switchbacks to zigzag up when the hill is steeper.
The snowshoes will have metal crampons (grip teeth) on the underside. These help you dig in and break through an icy crust and provide traction when going uphill. Moving up a hill in powdery conditions often feels like you are climbing a set of stairs.
It may take a couple of steps with the same foot to create a solid enough surface for footing before moving on to the next step. The snowshoes will have a heel lift option for use when the incline is steeper.
This will relieve the foot flex to a more neutral position, allowing for a more comfortable climb. Trekking poles on the uphill climbs should be shortened in length.
Relax with soft knees and shift your body weight to the back when snowshoeing downhill. Each step should be controlled, planting your heel first and establishing a sound footing before taking the next step. Using your trekking poles on descents will provide additional stability. Poles should be extended longer for the downhill.
What to do when you get stuck
Inevitably, you will find yourself in a sticky situation or even fall when you are out on the trail. The most important thing to remember is to stay calm and avoid panicking. If you fall, the easiest way to get up is to roll to your front and get up on one knee to stand up. If you find the snow too deep, use your poles to balance you as you stand.
Falling into deep powder can prove to be tricky. When standing up often, your movements can cause you to get deeper. Tamping down the snow to create a solid foundation to stand up on is the easiest way to get up in the powder and then get up on one knee to stand using your poles. Test your poles in the powder as support for standing before putting your body weight as they will sink too.
Potential Hazards
Snowshoeing comes with a list of hazards you should familiarize yourself with before hitting the trail. The number one safety recommendation is always to go snowshoeing with a buddy. Not only is it fun to have a shared experience, but there is safety in numbers by having someone there to help you up if you misstep or get help if things don’t go as planned.
Tree wells can pose a severe danger if you get too close to the base of a tree. You are at risk of falling, potentially not being able to get out on your own, or in deep snow. There is the potential for suffocation. Other hazards include buried rocks, creeks, overhead snowfalling, or avalanches. The local Ranger Stations are an excellent resource for assessing risks on the trail you’ve picked.
Getting to the Trailhead
Plan your trip so you aren’t caught at the trailhead unprepared. This starts with downloading your trail maps and bringing hard copies or both with you. There is often no cell service in the Alpine Mountains, meaning no GPS. The AllTrails app is an excellent digital resource; you can download and use a trail map offline.
It’s also a good idea to check in or call your local Ranger Station to verify your intended trail is open and to find out if there are any current updates they may have on trail conditions. They can also tell you if a parking or Forest Pass is required at the trailhead. Sometimes, pay boxes are at the trailhead for day passes, so make sure you have cash.
Be prepared for winter driving conditions, and before you head out, check the current road conditions, traffic reports, and if any hazardous weather is expected. Lastly, make sure your car is prepared for driving in winter weather or ready for a roadside emergency. See this post for tips on Winter Driving and Emergency Kit.