Beginners Hiking Guide: Discover Your Love Of The Outdoors

Learn the basics of day hiking with our beginner’s guide. Discover tips and tricks for choosing trails, packing essential gear, and enjoying the great outdoors.
Humans have a special connection with the outdoors nurtured when we get outside, breathe in the fresh air, and spend time hiking in nature. Time in nature has been found to reduce stress, promote physical and mental health and increase creativity.
Day hiking is a starting place for a beginner hiker and a gateway to a world of outdoor experiences in our wilderness areas. So, delve into our hiking guide for beginners and prepare for a whole new world to open up before your eyes.
No matter where your skill level or fitness level is, day hiking is a great way to get started. Simply put, day hiking is a hike completed within a day. This could be hiking in an urban park or hitting the trail at our national parks.
Maybe you aim to hike your first multi-day hike, backpack the Pacific Crest Trail, or do a long-distance trekking expedition. Day hiking is the right place to introduce yourself to nature and take steps towards larger goals outdoors.
How To Plan Your First Hike?

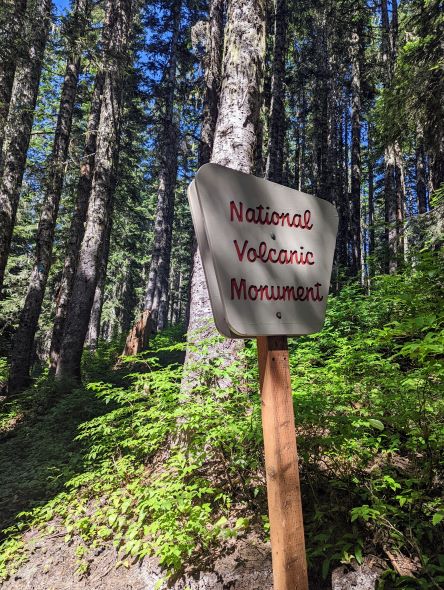
The best place to start when planning your first-day hike is in your backyard. Great trails are often in urban parks, state parks, or accessed at trailheads in wilderness areas. Important things to consider when selecting your first hike are the hiking trail length, terrain type, and elevation gain.
Your first time should be within your fitness level and a distance easily completed within daylight hours. A 3-6 mile hike with minor to moderate elevation changes is a good starting point for beginners. Try to find something close to home so you don’t have a long drive home when you are tired at the end of the day.
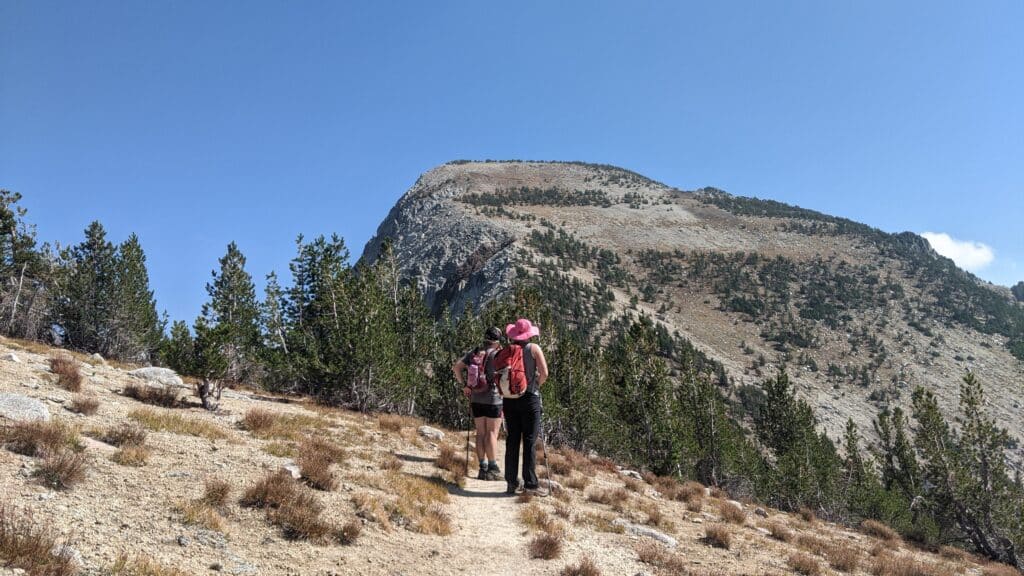
Find A Buddy
It’s always recommended that you hike with a friend. Plus, it’s a good time to share the experience with someone else, and there is safety in numbers even better if you have a friend who is an experienced hiker and can show you the ropes.
Local hiking groups, Facebook groups, or other social media platforms are options for gaining knowledge and finding other day hikers at your experience level.
Researching Where To Hike
Online and print resources are great places to start researching where to hike. The USDA and Forest Service website is an excellent resource for trails in our national wilderness areas. Trail reports are often updated by local rangers and provide information like trail conditions, permit information, and local ranger stations.
AllTrails is a popular app with outdoor enthusiasts that allows you to seek out hikes by location but is also a platform for posting current trail reports. This is an excellent resource for getting current trail reports from recent hikers in the area. Be sure to save any hikes you intend to do on the AllTrails app to be referenced when you are on the trail and outside a cell range.
If you use this source, pay it forward and report after your hike to help other hikers. Finding a hiking guide in your area to find hidden gems and new trails is also fun.
Recommendations From a Friend or a Local
Some of the best hikes are found by word of mouth and are often overlooked or not included in online resources. Look to friends who hike for recommendations for where to hike. If you are traveling outside of your home area, find a local or talk to a ranger about what they would recommend.
Outdoor Store
Your local outdoor store, such as REI, is an excellent resource for finding a hike or getting a recommendation. Their experts have some of the best hiking tips and can help you with any gear.
Weather and Season


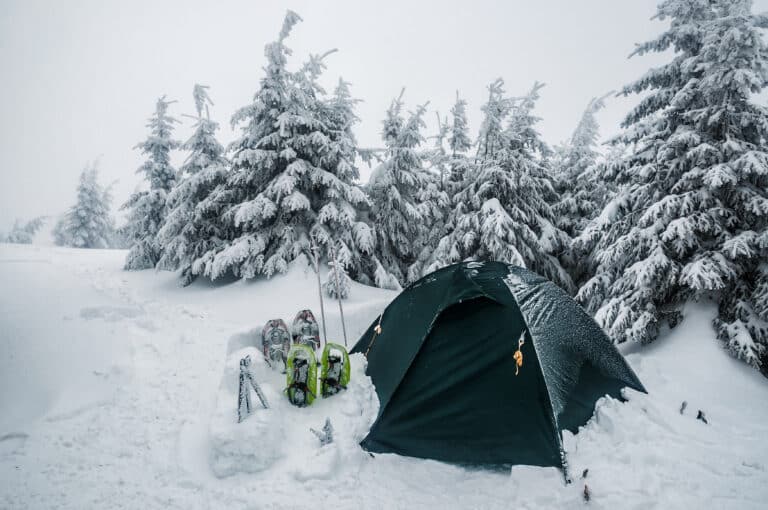
Another great thing about day hiking is that it’s an all-season activity. Although, as a beginner, it’s recommended that you use common sense and avoid the extremes when you first start. If the temperature is too hot or there is cold weather forecasted, special training and or gear may be required.
There are also safety concerns during bad weather or heavy rain to consider. Generally, the most enjoyable time will be on a dry day with a moderate temperature. Hitting the trail in the early morning is best so you have enough time during daylight hours should your hike take longer than expected.
Physical Fitness Level
Know your ability level, and it’s a good idea to start with an easy hike within your current fitness level. As you research hikes, consider the below and aim to find a hike that meets your criteria in each category.
Distance: New hikers without prior hiking experience who don’t clock the miles regularly with city walks or runs should aim for no more than a 3-6 mile hike. Building some stamina before hitting the trail is another way to prepare. This could be taking a long lunch break, brisk walking a few miles on the treadmill, or riding a stationary bike.
Elevation Change: Choosing an appropriate elevation change considering both gain and loss is equally significant to selecting the proper distance for your first hike. Your first hike should have a minimal elevation change. Aim for 500ft or less over 3-6 miles.
Hiking at higher elevations than you are acclimated to will also impact the difficulty level of your hike. Preparing ahead of time for elevation change could include short hikes with more elevation, walking sets of stairs, or building leg strength with exercises such as squats and lunges.
Hiking Essentials
The beauty of hiking is the low barrier to entry in terms of essential gear needed. This makes hiking an easy and inexpensive activity to try out. However, a few pieces of the right gear will make your first trip more enjoyable and safer without too much extra cost.
Clothing
What you wear on your day hike will vary based on the expected time of year, weather conditions, length of the hike, and terrain. Dress in layers to remove or add layers with long sleeves as your body temperature changes. Selecting multifunctional gear, such as convertible pants that also function as shorts, is ideal.
Consider materials made from synthetic fabrics or merino wool that wick moisture, provide UV protection, and are quick drying. Pack extra layers of clothing to keep you warm. A packable down jacket will keep you warm in an emergency and stows away easily.
Always plan for RAIN even if precipitation is not in the forecast. You should wear or carry a rain jacket in your daypack and waterproof footwear.
Footwear
A good pair of trail runners or hiking shoes should be one of the first gear you purchase. However, you will likely start hiking at shorter distances with easier terrain that can be navigated using comfortable athletics shoes. Check with your local outdoor store for sizing and recommendations based on the terrain you plan to hike, your foot shape, and your gait.
Consideration should include comfort, stability, waterproof material, grippy soles, ankle support, and toe guards. Once you invest in footwear, breaking them in before hitting the trail is an excellent idea so that any issues will be discovered beforehand.
Plus, maybe wearing your new hiking boots to work is an easy way to become a conversation starter and could be a way to find a new hiking buddy.
Whatever you select for trail footwear may complement a pair of gaiters. Gaiters are worn over your boots or shoes with an underfoot stirrup and fit snugly around the ankle area, keeping debris, small rocks, needles, or other irritating stuff out of your shoe while on the trail.
Depending on the terrain you are hiking, they may be a great option and will save you the frustration of repeatedly stopping to shake out your shoes.
Daypack
A daypack is a backpack designed to hold enough gear for your time on a day hike. Anytime you hit the trail, you should plan to carry, at minimum, some essential gear so you are prepared for the unexpected.
A good backpack should be comfortable for your body type when weighted down. Choose something with multiple storage compartments, comfortable shoulder straps, and a waist belt.
Think about exterior pockets for your water bottle compartment or space for a reservoir. Daypacks are sized by volume, and 20- 35L is usually enough space for all your gear without adding extra weight. It should also be waterproof or have a waterproof cover.
The 10 Essentials – Any time you hit the trail, whether on a day hike, these are the essential hiking gear to never leave home without. Check out our Printable 10 Essentials Checklist here!
- Emergency Shelter, Bivy, or Emergency Blanket– Plan and carry an emergency shelter anytime in the wilderness. This can be lifesaving should you end up on the trail overnight or find yourself injured as temperatures and weather quickly in the mountains. Any of these options are very small, lightweight, and compact enough to go unnoticed in your backpack and hopefully unused.
- Pocketknife or Multitool– Find something you like and are comfortable using, and designate it for your daypack. Many options come with keyrings that can be attached internally to your bag, so you’re always prepared.
- Small First Aid kit and whistle. Essential First Aid Kits. Find a basic first aid kit you like and plan to add to it for your specific needs. Additional items such as anti-sting wipes, anti-diarrheal, moleskin (for blisters), and hydration tablets are good additions often not included in first aid kits.
- Extra clothing– Plan to have enough clothing to keep warm should you unexpectedly find yourself spending the night on the trail. This includes an insulated jacket (recommend a packable down jacket), raingear (packable), beanie, gloves, etc. These items should always be in your bag, even if the weather forecast is good.
- Extra Water, water filter, or water purification tablets
- Headlamp or Flashlight– Something small and lightweight. Don’t forget to check the batteries!
- Extra Food– This is in addition to the planned food or lunch you carry.
- Matches, lighters, fire starters, or stove
- Protective Gear- hat, sunglasses, sun protection, sunscreen, bug spray, and protective clothing
- Navigation– Map, GPS compass, and know how to read/use it
Water and Water Treatment
Hydration is essential, and carrying EXTRA water is the most important item in your bag- this is something to take very seriously on the trail. Plan to bring enough water for your trip plus reserves and have a water treatment option should you run through your water supply.
A good rule of thumb is 0.5L for every hour you plan to be on the trail, and double that if you are hiking on a hot day or in an exposed area.
A water bottle will work fine for shorter hikes, and using a reservoir works best on longer hikes. Always, Always, Always plan to carry more water than you need AND have an emergency backup option to filter water should you run out of water from a water source along the train.
Food and Snacks
Trail snacks are a must and can be ritualistic, especially if you designate a food item you like just for hiking. Depending on the length of your hike, you may plan to have a sack lunch or carry snacks. You commonly get hungrier than usual on the trail since you exert much energy.
Plan to take the food you’ve eaten before and know will digest easily, thus not upsetting your stomach. Food that doesn’t require refrigeration and is easy to eat is ideal. Here are some ideas for good trail food: PB&J sandwiches, granola bars, jerky, dried fruit, nuts, crackers, and cheese.
Navigation and Emergency Communication
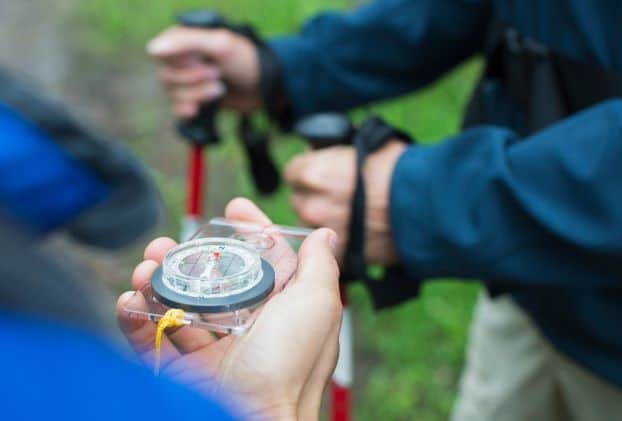
One of the BEST things about hiking in wilderness areas is the lack of communication – yep, there is a real chance your phone will not have service. This may be scary for those of us who always had a level of connectivity. With proper preparation and skills, it can be the disconnect you have been yearning for.
Remember your cell phone cannot be depended upon for navigation, so please bring one of the below and understand how to use it.
- Paper Trail Maps (ideally- waterproof) Trail maps can be found online, and your local outdoor store will usually have maps for popular hiking spots in the area. Print your own at CALTOPO.
- Compass – Basic navigation skills using a compass can be fun and lifesaving should you lose the trail or become lost. YouTube is great for learning to orientate with your compass.
- GPS – There are many on the market with options for downloadable maps. Be sure you are fully trained in using and aware of the battery life.
- Garmin inReach- This is a newer product with a GPS satellite communicator that allows you to connect without cell coverage, send emergency messages, and has the technology to help you track back to where you were should you lose your way.
Trekking Poles
Trekking poles provide additional points of contact on the trail to help safely navigate challenging hikes. They help provide traction by taking the weight of your legs on a steep incline or during descents.
This optional gear may not be needed as a beginning hiker but becomes essential as your hiking progresses to more challenging terrain or on your first backpacking trip.
As a beginner, you may want to try trekking poles, especially as you challenge yourself with variable elevation.
Other Items you may want to bring:
Camera, binoculars, bear spray (if you are hiking in bear country), journal
When Nature Calls
For some of you, going to the bathroom in the woods is daunting and possibly an aversion keeping you from venturing into the wilderness. So, let’s put your mind at ease and tackle this roadblock with a solid plan should you go when you are on the trail.
For many, you may be able to use the facilities at the trailhead and be fine the rest of the day. It’s just a matter of time for the rest of us until we get the urge.
Proper disposal of human waste is critical to minimizing the spread of disease, keeping water sources clean, promoting decomposition, and avoiding the chance anyone else comes across it.
Burying human feces is a generally accepted manner in most locations. However, some fragile environments require solid waste to be packed out.
Bathroom Kit
Plan to carry a bathroom kit, which should be contained in its bag or zipper pouch for easy removal from your daypack. It will need a small, lightweight trowel, toilet paper, personal wipes/products, hand sanitizer, and small plastic bags for carrying out waste (scented dog poop bags work great and are necessary for areas where waste must be packed out!).
Doing Your Business
The perfect spot will be off the trail but close enough that you don’t lose the trail. It will have some privacy, such as a tree, log, or large rock to crouch behind or to use for balance. Pick an area at least 200 feet from water sources such as creeks, rivers, or lakes.
If you need to pee, burying isn’t necessary if you plan to air dry and/or carry out your used toilet paper. Stand or squat, pee, and pack any used toilet paper in your small plastic waste bags to carry out. Check out these reusable antimicrobial pee cloths as an eco-friendly alternative to toilet paper.
If you are going number two, there are a few additional steps. You will use your trowel to dig a cat hole 6-8 inches deep that you will squat over and do your business. It’s best to squat low with your butt below your knees.
It’s easiest if you bunch your pants or hiking shorts close to your ankles and keep them clear of your bottom. Find a handhold for maintaining balance, such as a branch or stump.
Any used paper can be buried in the hole with the waste. Cover waste ultimately to promote decomposition and ensure your fellow hikers don’t encounter it. Use available rocks or sticks to camouflage the area, not to attract wildlife.
Female Hygiene on the Trail
Having your period on the trail could be a deal-breaker for many. But the good news is with a solid plan. It’s no reason to abort your hike. If tampons or pads are your product, they must be packed and included in your bathroom kit, along with personal wipes and plastic disposal bags (dog poop bags are perfect for this).
Menstrual cups are ideal as they don’t create waste, and contents can be buried in a cat hole. Another benefit on heavy days is they don’t have to be emptied as often, reducing your trips to the bathroom. Choose the best way for your preference and familiarize yourself before heading out on your hiking trip.
Leave No Trace
This ethical practice has a central idea that teaches us to enjoy nature while minimizing our impact. This includes our impact on wildlife, overuse, erosion, and trash. We wouldn’t have life without nature, and we can make a difference in protecting this asset with our daily actions.
Practicing Leave No Trace

It’s not limited to the backcountry and trips into the forests- we should practice these principles whenever we are in nature. Whether you’re in a local park, on a neighborhood walk, or crossing the grocery store parking lot- practicing Leave No Trace significantly impacts you.
Don’t Be A Litterbug
Humans’ most visible impact on nature is leaving evidence of our presence in trash, litter, and food scraps. Not only does trash take away from the beauty of our natural spaces, but it can have a lasting effect on our planet. Some plastics take hundreds of years to break down and break into tiny microplastics, polluting our oceans.
And YES, orange peels and apple cores count as litter. It doesn’t matter that they biodegrade. Pack ’em out!
Stay On the Trail!
Leave No Trace teaches us that trail erosion and other human-created erosion have a lasting effect on our ecosystem. This includes damage when we go off trails, cut switchbacks, leave the designated area, or trample sensitive vegetation. These fragile ecosystems can take up to 30 years to repair themselves.
Help Keep Wildlife Wild – Don’t Feed the Animals
We’ve all heard it before not to feed the wildlife, but Leave No Trace reminds us why this is so important. Even with the best intentions, feeding wildlife has a negative impact. First, it’s unhealthy for animals to leave their native foods.
They begin associating humans with food, which can lead to an association of humans with food, potentially endangering themselves and us.
Trail Etiquette and Unspoken Rules
Hiking has a set of generally acceptable behaviors that help us enjoy our time in nature. Here are a few:
- Know the permit rules for your hike, and always check the information board at the trailhead.
- Anywhere side-by-side passing isn’t possible. The uphill hiker has the right of way, so downhill hikers should look for a place to safely pull off the trail to allow the uphill hiker to pass.
- When hiking with your dog, always follow the leash laws, pick up after your pet, and keep your dog clear of oncoming hikers. A note on picking up after your pet means coming prepared with dog poop bags and planning to pack them out. Do not be one of those people who leave filled poop bags on the side of the trail only to be forgotten later. Your pet is your responsibility.
- Leave your music at home! Loud music can disturb wildlife and your fellow hikers who come into nature to get away from it all. And no headphones are not the solution as they pose a safety issue to yourself, covering up the sounds of potential hazards such as wildlife, falling rocks, or water. Use this time to unplug!
- Pack animals such as horses, llamas, mules, and their riders ALWAYS have the right of way on the trail. Give these animals a wide berth as they can easily be spooked, putting yourself and their riders at risk.
- Step aside for faster hikers, trail runners, and bikers so they may pass you.
- Stay on the trail whenever possible and within any protective barriers or railings. They are put there for a reason, so let’s not have any more selfie statistics.
- Leave wildlife alone, don’t feed, and enjoy viewing from afar.
Safety and Emergency Planning
Once you’ve decided on your hiking plan, it’s your responsibility as a hiker to consistently communicate it to a friend, family member, or another responsible person.
This should include the location of your intended hike, what trailhead you will start/finish, where your car will be parked, who you will be hiking with you, what gear you will have, and when you expect to return.
This will include a plan of what time they can expect to hear from you and a time they should plan to alert authorities should they not hear from you.
Take a Class
Outdoor first aid and emergency preparedness certification courses are available online and in person. These certifications teach you effective first aid treatments for common outdoor injuries and illnesses, CPR, wilderness survival, and how to make appropriate evacuation decisions. Your local REI or Red Cross Chapter is a significant first step to research options.
Conclusion and 7 Key Takeaways:
Day hiking is the perfect entry point for beginners to explore nature and reap the health benefits of being outside and active. It doesn’t require much knowledge or expensive gear to get started. People of all ages and physical skill levels can day hike.
Day hiking is the foundation and an entry point to many other exciting ways to experience nature.
Being prepared is crucial to having an enjoyable and safe first trip.
- Dress in layers with suitable footwear.
- Always carry The 10 Essentials
- Hike with a buddy
- Know your skill level and hike within your limitations
- Follow Trail Etiquette
- Practice Leave No Trace
- Communicate Your Plan
Links to relevant posts: