Part 8 – Exploring the Best Heating Systems for Your Van

It was towards the end of October 2020; we were in the Southern region of Yellowstone National Park and about 3:00 in the morning. I’m pretty sure the teeth chattering that woke me up was my own.
I had to work up the courage to get out from under the covers to check the temp and why the heater we had, had stopped. As I stared at my little REI backpacking thermometer, my eyes kept moving down to the bottom of the scale.
It was 7 degrees inside the van. Now that I had thoroughly messed my head up with this new information, it was time to figure out why the heater was not working anymore. We were using one of those Mr. Buddy heaters that can be used indoors, and for the life of me, there was no restarting it. The cold was winning.

So, the only thing I could do was climb back under the covers and pull them over my head.
One of our inaugural trips with the van was a road trip trip to Yellowstone National Park. Very minimal conversion had been done so far. We were on our original insulation idea and the factory plastic wall panels and just an air bed, so, yeah, very basic at this point. Once we got back home, it was time to spend some brainpower on what systems we were going to use.
Here in this 8th post in our Van Build Series, I’ll be going over our heating systems and what we feel is the best option for us that is.
Heating System Options
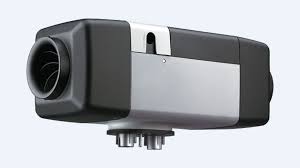
When it comes to heating your van, there really are only a few options. So you might be asking, what is the cheapest heating system for my van? Well, the typical and cheapest heating method is the Webasto or Espar model (I call these shoebox heaters) that can be installed under the passenger seat or in another small area in your van.
You can choose diesel or gasoline models that will sip fuel off your main tank to operate and heat the interior of your van. There is also Propex that uses propane to operate, an option for many that plan on using propane to fuel other equipment in their van build.
In my opinion, these options are great for smaller vans or vehicles that just need a bit of heat. For the larger vans, I feel you need something with more power behind it. I suppose you could always install a second shoebox heater in the van. That certainly could be a cheaper way to go.
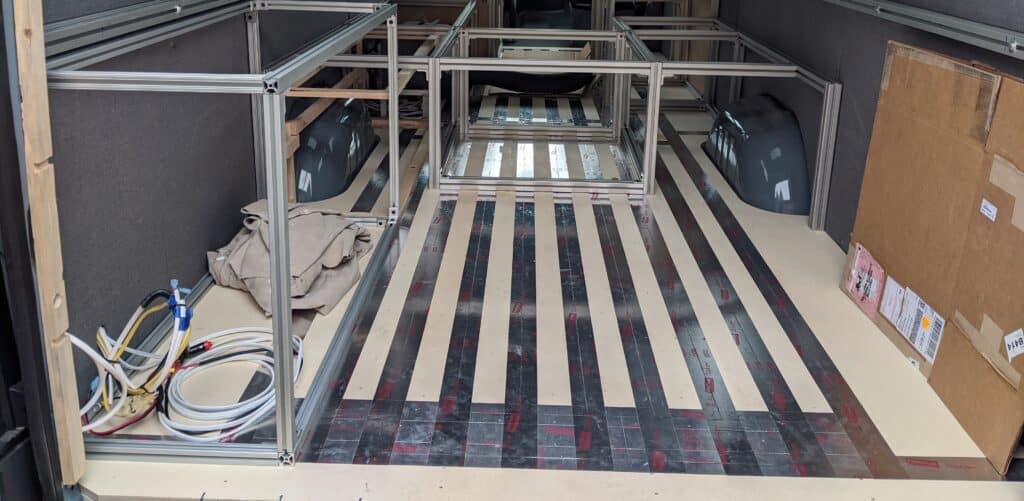
Then there are systems that are more detailed. A hydronic heating system is built up from the factory floor using layers of plywood and insulation to encase tubes to move glycol solution throughout the flooring. The heated floors are working to maintain the temperature you have set with your thermostat.
Our Heating System
We went with the Van Life Tech system, a very robust system. We went with the hydronic heating system they offer. Since our plan was to live in our van full-time eventually, we wanted comfort with some extra benefits. Their system consists of heated floors, a small water heater, a thermostat with wifi, and the ability to add a recirculating shower.
The system uses a glycol solution which is circulated through the tubes, creating heated floors. This same coolant is also heating a heat exchanger, which in turn heats a small 4gal water heater. This water heater supplies hot water for our sink and our exterior shower, which is basically used for the dogs.
This system also uses a shoebox heater to help maintain interior temperatures with an interior air vent. One area that we did overlook was the installation location of the air vent, it points directly at our refrigerator, this, in turn, makes the fridge work harder, not to mention the heated floor below the fridge. So, this is an area we’ll be working on at some point.
When the installation is complete, you can easily see where the tubes (as seen in the photo above) are running so that you do not screw or nail anything into the tubes themselves. Their website goes way deeper into the specs of their system, and I merely covered the basics.
Pros and Cons
Pros: With the heated floor system, the entire flooring area of the van is heated, except the cab area. So, if you have water tanks installed inside, then you’ll have to do something to help reduce the heat transfer to your tanks.
Which, honestly, is something we are still working on. We make little changes here and there to help reduce it. There are no cold spots in the van, even when it is -3 degrees outside and 70 degrees inside. Another major positive is the power consumption, on average it only uses about 40w.
Cons (but not really): The installation does increase the height of your floor, so it’s something to keep in mind when you are planning. If you have interior water tanks sitting on the floor, they will be heated. If you plan on having a garage area, this will also be heated. You just have to keep this in mind when designing your conversion.
Conclusion
For us, the Van Life Tech system was the only way to go. Not only do we know it’ll keep the interior comfortable when temps are extremely low outside, but I can monitor it when I’m away from the van.
We do not want our two girls to be cold when we are out enjoying the slopes. As far as cost goes, it is not cheap, but for us, well worth the cost for comfort and peace of mind in our heating system.