Van Build Series | Part 10 | Exterior This and That
In this post, I’ll go into greater detail about smaller areas of our van build series and other one-off items. We did not build a stealth van, so our goal was not to keep the exterior “Plain Jane”. Also, everything we’ve added is not just for aesthetics. Another important note: none of these items have been given to us or paid reduced prices.
We paid full price for these, so if I come across as promoting some of the manufacturers, we are not being compensated. These are products we went with and have used for some time now and could not be happier with. Please enjoy the read and if you have any questions at all on any of these products, just let me know.
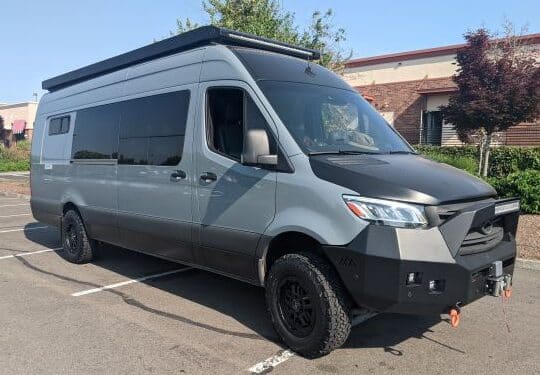
Front Bumper, Driving Lights, and Winch
We searched and searched for a bumper we both liked. There are many bumpers out there for our can that are pretty cool looking and functional, but it only came down to one that we both agreed upon. It ticked all our boxes.
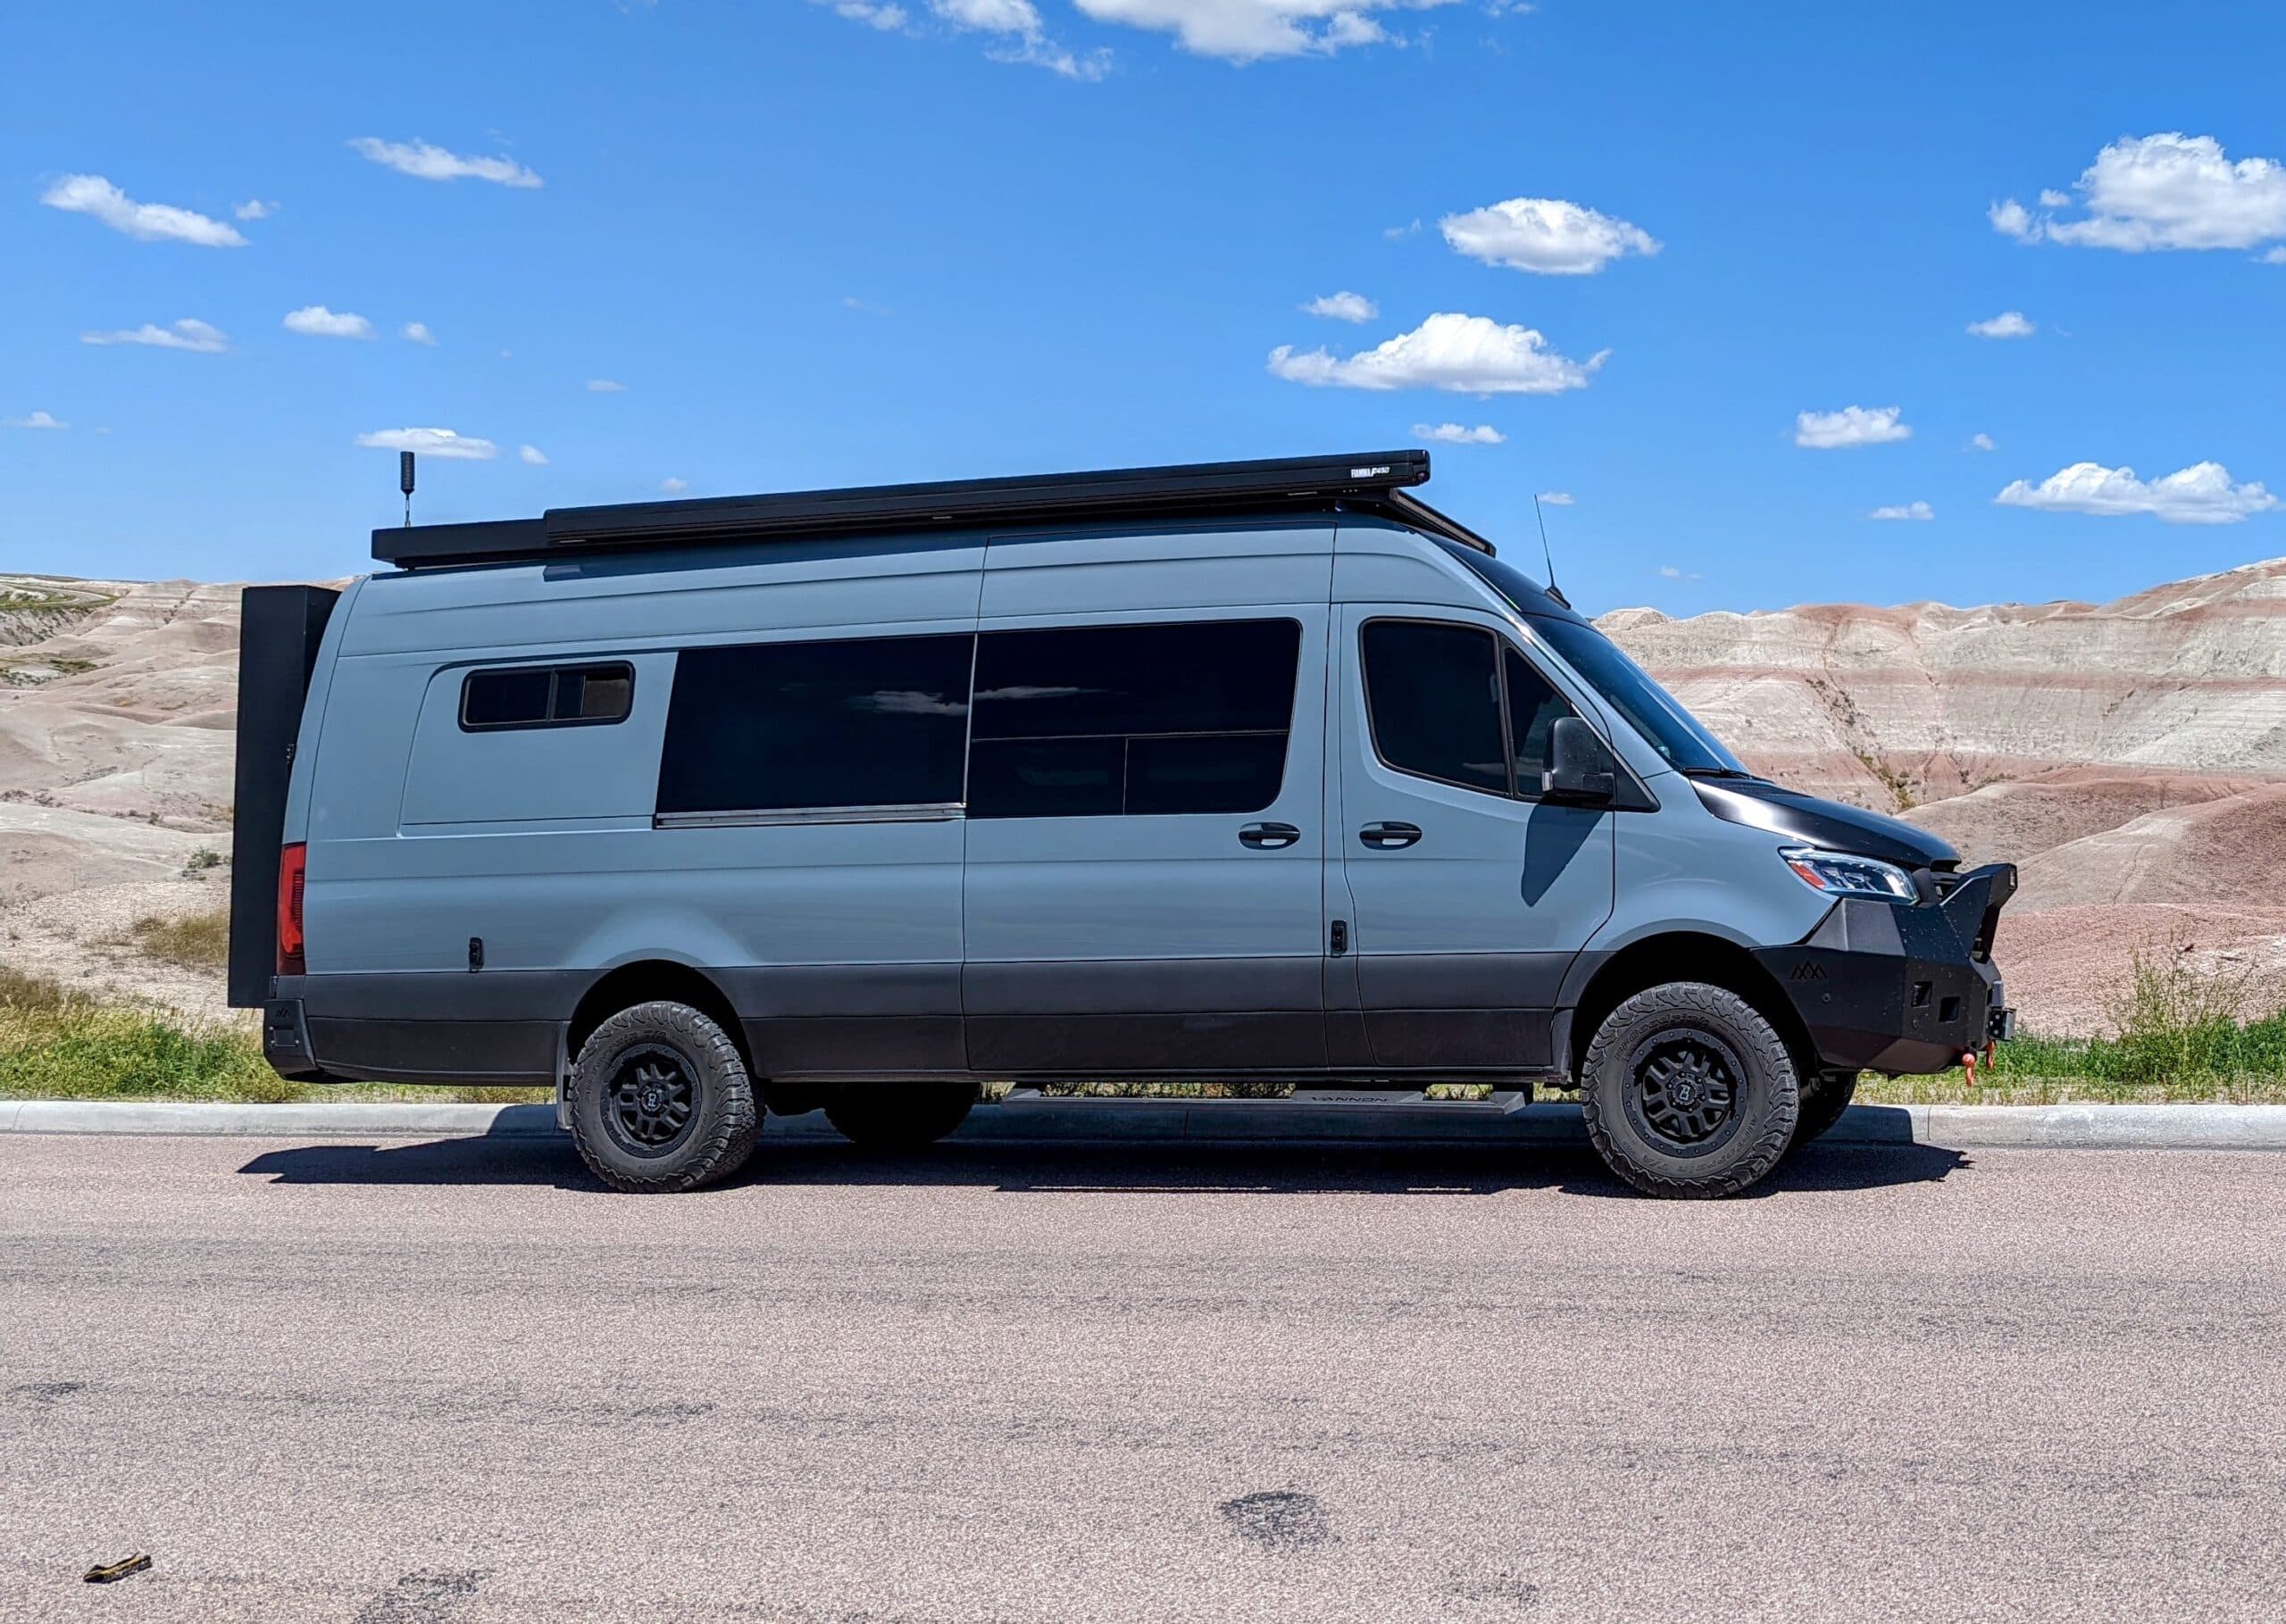
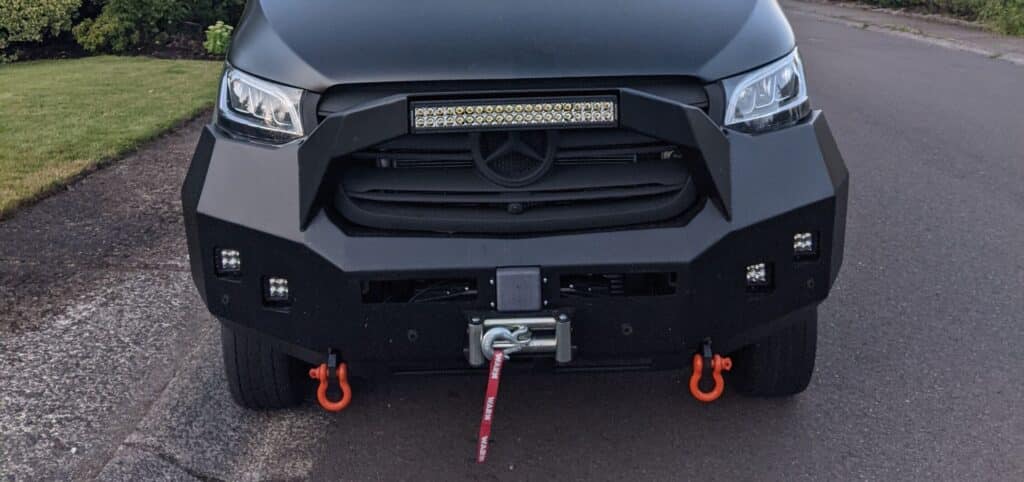
The Backwoods Adventure Mods front bumper with bull bar. This thing is badass. For lights, we went with the Pathfinders they offer four floodlights and a 20″ light bar. And added a Warn winch for those oh crap moments.
Roof Rack, Lights, and Ladder
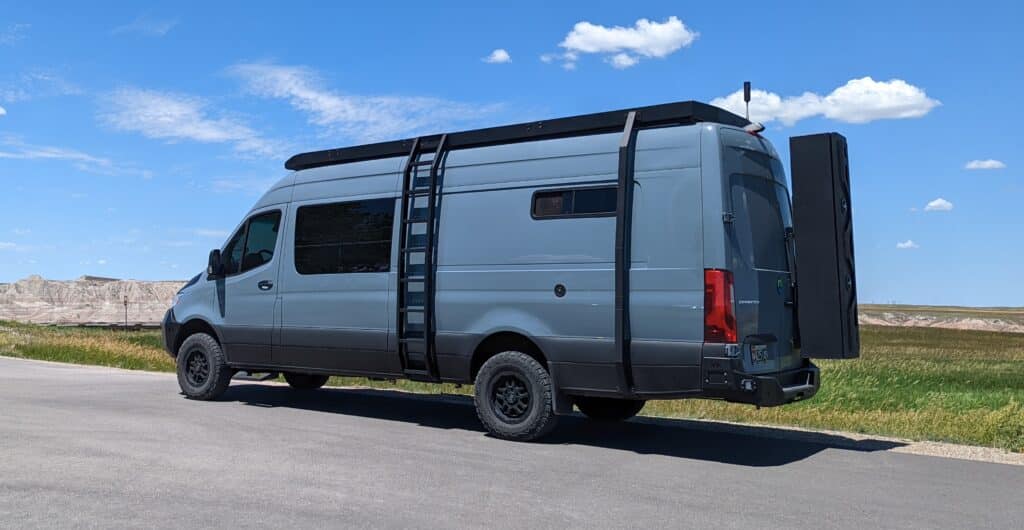
Here we really wanted to keep with the theme of the front bumper, straight lines, and angles, no round edges at all. Here we went with Backwoods again and their Slim roof rack with a ladder. We went with the option of adding a 50″ light bar.
We drive a lot at night and through parts of the country where wildlife is prevalent. This setup lights up the road!
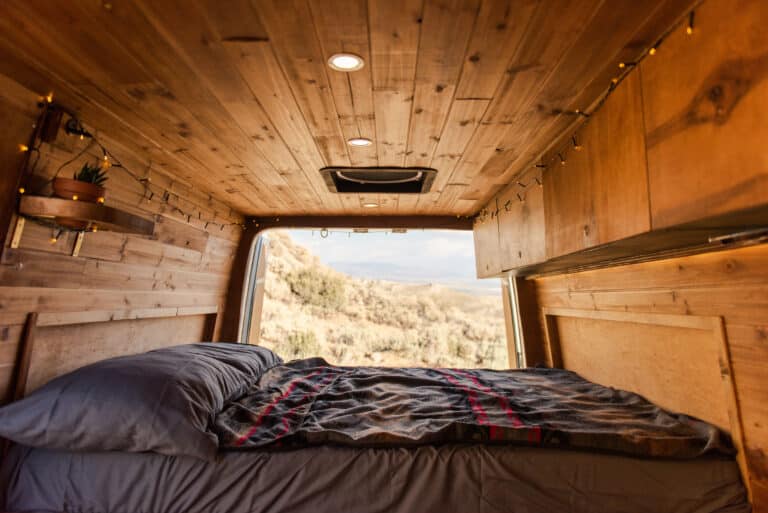
Sunroof
I was a little skeptical about installing a sunroof in the van, thinking it was not necessary. Now that we have one, I would not have it any other way. When we are boondocking out in the middle of nowhere and there is very little light pollution, you can lay in bed and watch the stars do their thing.
Another plus is we have easy access to the roof from the interior since the sunroof glass is completely removable. However, this did not allow us to install the AC unit in the rear or move the MaxxAir to the rear to help with the airflow.
With an extended model van, it takes a little longer to cool the rear down, but the nice thing is you do not have the noise of the unit right above your head in bed. Would I change anything? Absolutely not. In the future, I may install a second MaxxDome fan in the rear to help pull cooler air to the rear, but then again the noise of the fan would be annoying.
MaxxFan Deluxe
I believe all the hype about these units is true and deserves all the praise they get. I loved how many options this thing had with the different fan levels, running the fan while traveling down the road.
If you needed it to exhaust air from the interior it did it in a jiffy, with a rear window cracked it would move some serious air. I only wish I could figure out a way to use it in our current build. But for the moment I’m saving it to use down the road.
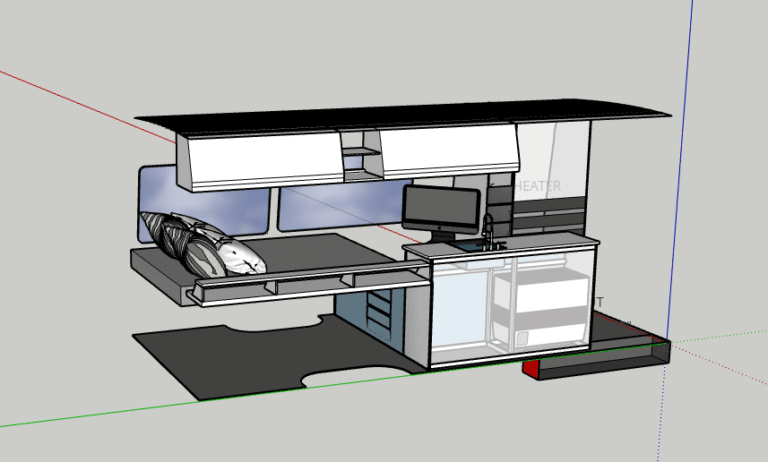
AC Unit
There were not too many options regarding AC units for our build. After researching the options, we narrowed it down to two options Nomadic Cooling offered. Their in-house options and Dometic. We went with the Dometic RTX2000 model, which is 12V and puts out some serious air.
Now we have an extended model and due to the prior installation of a MaxxFan, we needed to install it in the front of the interior since we already had a sunroof installed above the bed.
A couple of other pros of the RTX, you can get away with using the existing hole for the MaxxAir and you do not need to use the entire interior housing that comes with the unit (it is way too large).
MaxxFan Dome
Since we needed to install our AC unit into the spot we had our MaxxFan Deluxe installed, we no longer had exhaust fan capabilities. Plus, we were not able to move the fan to the rear section of the van. So, we needed a product that we could install and be able to exhaust the interior air.
We found the MaxxFan Dome option. It has a very small footprint so we were able to install it to the left of our AC unit, which is above the area of our galley area. It works quite well but only has an on/off button.
There is no switch to control the speed of the fan, plus no way to set a running time shutoff timer. I suppose there are aftermarket products I could install and if there are please let me know. We did not go for the Plus model.
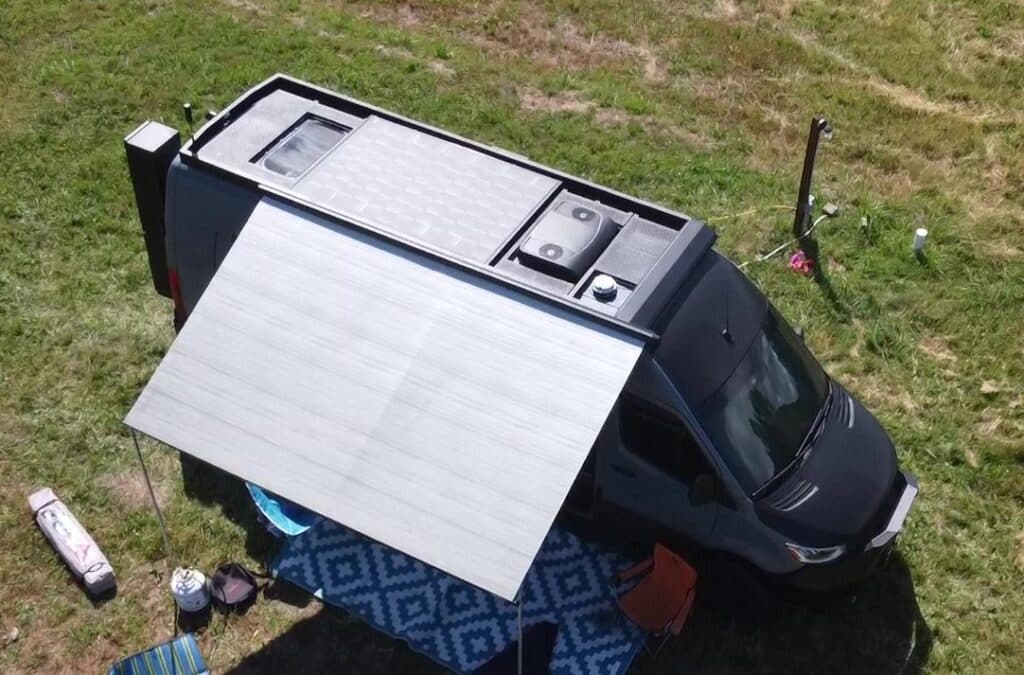
Awning
I knew I wanted a Fiamma awning but had a hard time deciding which model I wanted to go with. It was either the manual or electric model, it was a tough decision for me. The pros for the manual version were I did not need to run power to it and in wind, it would not automatically furl back up.
Now the pros of the electric model are it is powered and I could furl it back in from the interior of the van or it would do it automatically when the winds were getting too strong for an awning.
Now, I’m not sure if I made the right choice or not, but I love the awning, it works great, looks great, and is very low maintenance. All positives in my book. But a part of me thinks of what it might have been having the other model.
There have been a couple of instances where it started raining and the winds were picking up, I would have stayed completely dry with an electric model. On the flip side, we’ve been in some more windy areas and an electric model would have been furling in and furling out. So who knows, but I’m sticking with my decision.
500w Solar Panel
I did a lot of research and watched a lot of YouTube when it came to our solar panel. In the end, there was only one option, Tiny Watts Solar (now known as Tiny Watts Power Solutions) 500w Roof Deck. This unit is built with military-grade monocrystalline cells and you can walk around on it. It’s awesome!
Our best yield to date has been 2.76kWh, that’s a lot of juice back into the batteries.
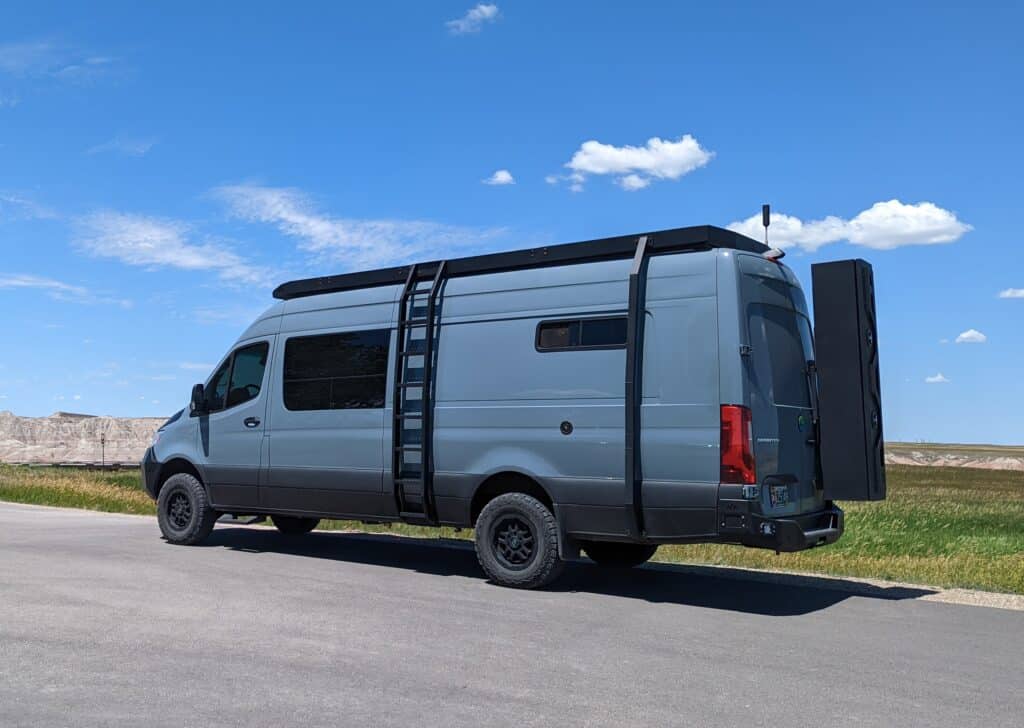
Rear Bumper and Lights
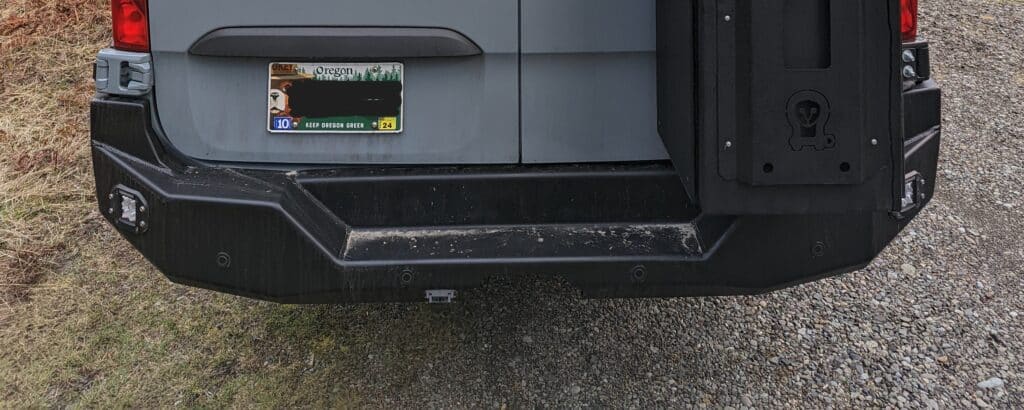
So our front bumper was from Backwoods, it made this one easy. We went with the Nomad Rear Bumper. This bumper allows us to use the factory sensors, blind spot assist, and additional lighting for Pathfinder flush mount lights. It maintains the same lines as the front bumper, roof rack, and ladder, so it takes the badass to another level.
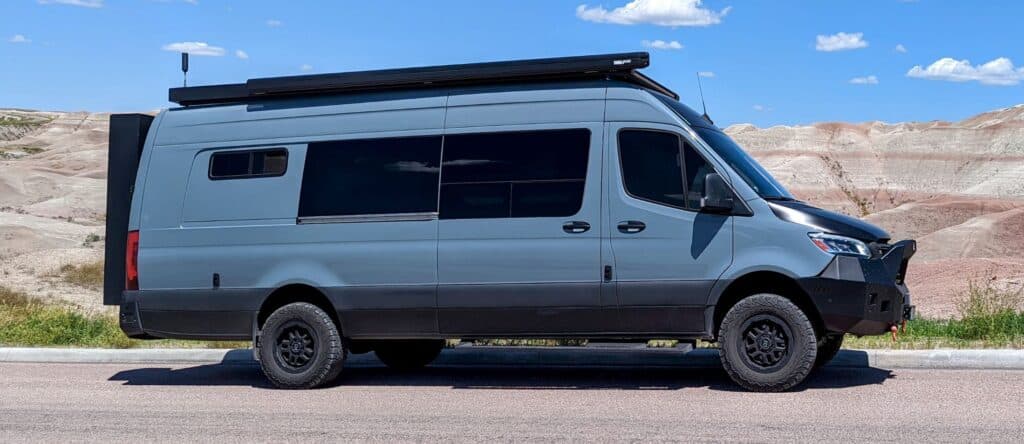
Tires and Wheels
Like a lot of other people, we went with BFGs. They just look awesome and I had used them on several vehicles in the past, so I know how good they are in all four seasons. Tires and wheels were not on our schedule to do yet, but an incident on the road coming down from Cloud Cap on Mount hood, totally changed things.
We still had the factory tires and they seemed to work well until now. So, there I was changing a tire on the side of the gravel road. It was an easy process but still is never fun when changing a tire. Now we were left with tires and one ugly one.
I looked around for tire and wheel deals and was not finding a lot out there. it was easy finding deals on the tires alone, but when it came to wheels, not so much. There are not a ton of manufacturers that produce an aftermarket wheel for our van, so we bit the bullet and decided to spend some more money on something that really looked awesome.
We paired the BFGs with the Black Rhino Barstow matte black model. I was able to purchase the two together through Discount Tire, benefits of going through them were great prices, service, and free tire rotations.
Suspension
As the build goes on, you start to notice the weight of the van increasing. As you get towards the end of your build, you may realize when looking at the van and driving the van, especially in corners. A pretty good lean was becoming noticeable when driving the van through corners.
Also, when looking at the van from the side, it was really sagging in the rear, even when the water tanks were not full.
It was time to research suspension systems. Again there are not a lot of options out there and the options that are, are spendy. Another disadvantage was availability, this was a huge problem. All the options we wanted to go with had huge lead times.
We finally found a local option through The Sprinter Store. I was able to research the individual items in the build and I was comfortable with moving forward with this option. We went with the REK system and added struts up front and shocks in the rear.
There has been a hugely noticeable difference, so much nicer to drive, very minimal lean, and driving on gravel roads is no longer a cringe-worthy activity. Do yourself a favor, if you have not upgraded your suspension yet, look into it, you will not regret it.
But do your research and go with a product that is right for your driving and the weight you are driving around with.
Ski Locker
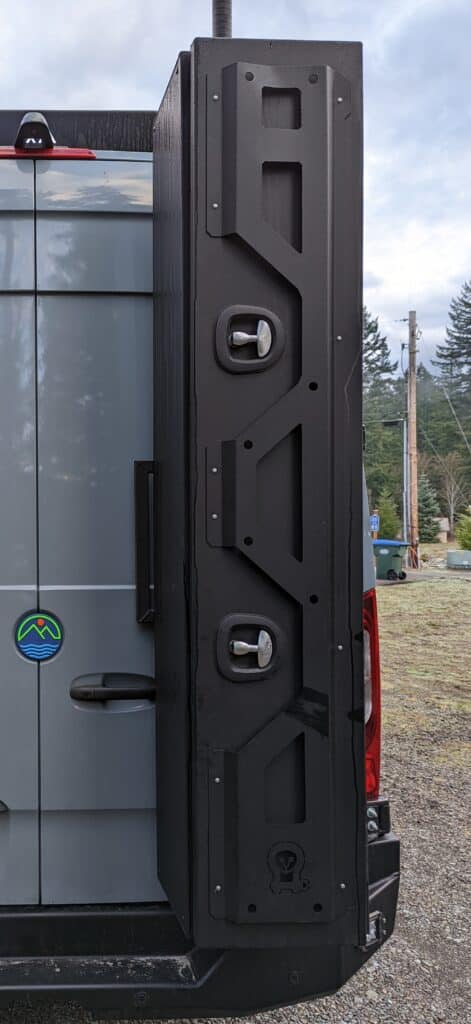
Up to now, we were storing our skis in the van’s garage, hanging them from the 80/20 supports for the bed. And placing our boots in a storage bin to contain the snow melt when the day was over. This made for a crazy situation since we typically travel with four pairs of skis and a snowboard on our chasing snow excursions.
It was spring break (not for us specifically) and we were spending our week at White Pass Ski Resort enjoying the sun and powder days. We noticed a van, driving through the area a couple of times and saw a large tall box on the back.
Not really knowing what it was at the time and brushing it off. We kept seeing this van around and one day they were unloading their skis from it.
Thus beginning another internet product search. This one was a difficult item to chase down. I remember seeing Roost on the side of the van and knowing it was a local van build company, I reached out to them and explained what I was trying to find.
They did not supply the product for the van but gave my contact info to the owner of the van. He was kind enough to call and leave me the manufacturer, Owl Vans.
Now at this point, this item was not on their website so I sent in an inquiry. Not too long after I received information back on this box. Turns out this locker was a seasonal item and at the moment they did not have any and were looking for another manufacturer to build these for them.
After a lot of following up (hounding), they had a manufacturer and had some being built for the 2021-22 season. The rest is history now, they reached out and were taking deposits for the new ones, and not too long after a big cardboard box arrived with our new ski locker inside.
Running Boards
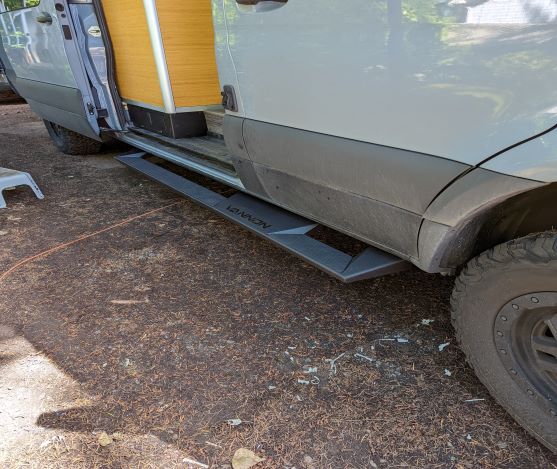
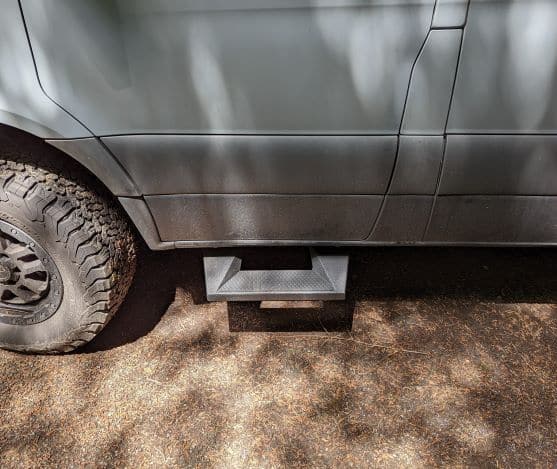
This was a difficult one to nail down since many of the manufacturers use round tubing or other rounded styles to build their running boards. We do not like that look personally for us and our van. We finally found Vannon. They offer what they call a running rail that totally compliments the rest of our exterior add-ons. They had a quick turnaround as well. I am very happy with this item.
Up to this point, we had been using a plastic step to get up into the van. With our van being four-wheel drive, larger tires and wheels, and a suspension system our first step into the van was a pretty good one, so a step was needed. These Vannon Running Rails are a lifesaver, more than once I’ve slipped off the step or stood on it improperly and the step would roll.

Items Used in the Build
Front Bumper
Rear Bumper
20″ LED Light Bar
50″ LED Light Bar
LED Flush Mount Lights
WARN Winch
500w Roof Deck Solar
Owl Vans Ski Locker (Seasonal item, not on the website at the moment)
Vannon Running Rail Set
REK Suspension Package
Our sunroof model is no longer available